Mastering Watercolour Clouds: A Step-by-Step Guide to Soft, Realistic Skies
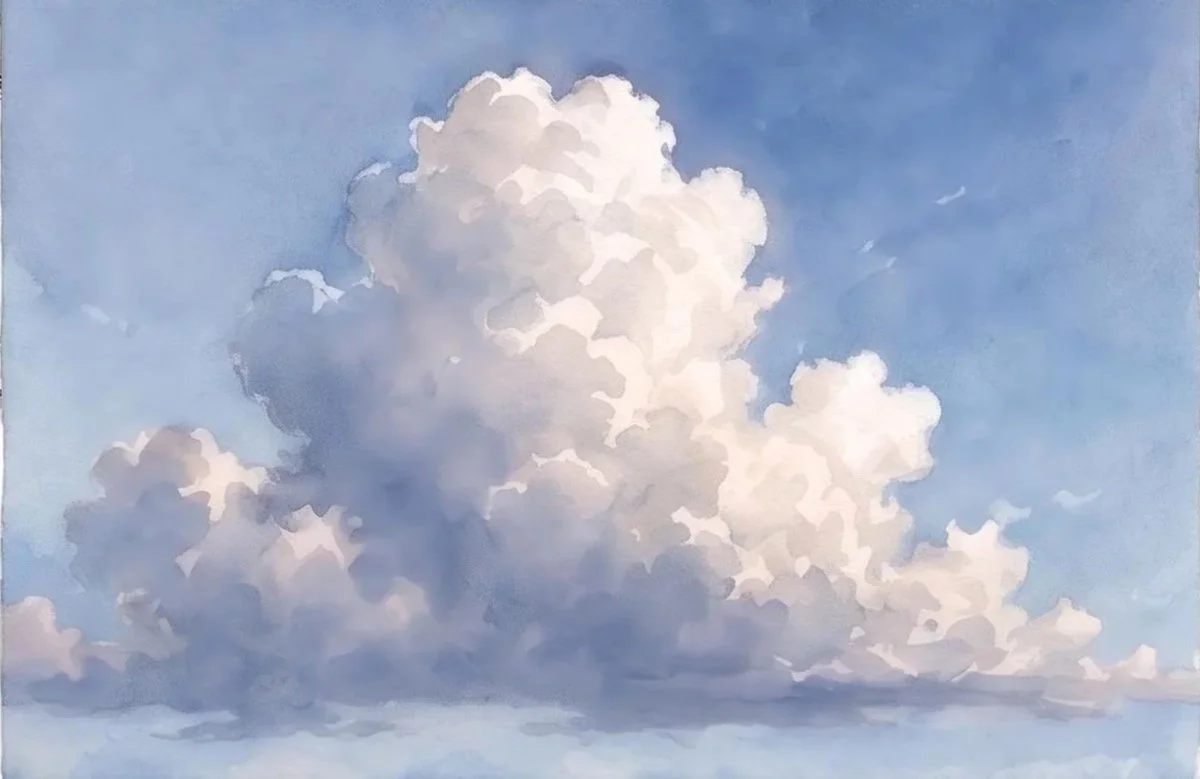
There is something undeniably magical about a perfectly painted watercolour sky. But if you’ve ever tried to paint a cloud only to end up with a muddy, heavy smudge on your paper, you know it’s trickier than it looks.
The secret? It’s not just about the paint you put down, it’s about how you manage the water, the edges, and the light.
Whether you’re painting a breezy daytime scene or a dramatic sunset, this simple guide will break down the essential tools, color palettes, and techniques required to master watercolor clouds.
1. The Right Tools for the Job
Before you touch brush to paper, having the correct supplies will make a world of difference. Watercolor relies heavily on the behavior of water and paper texture.
The Best Brushes
A Large Flat Brush or Mop Brush (1 inch to 1.5 inches): Essential for laying down clean water and large, smooth sky washes quickly before the paper dries.
Medium Round Brush (Size 6 or 8): Your workhorse brush. It holds a good amount of water but tapers to a fine point, perfect for blocking in cloud volumes and pulling out soft shapes.
Small Round Brush (Size 2 or 4): Reserved exclusively for the final stages—adding texturing details to the edges and refining tiny highlights.

Paint & Paper
The Paint: Artist-grade transparent watercolors are ideal. Look for highly granulating pigments if you want extra natural texture in your shadows.
The Paper:100% Cotton, 300 gsm (140lb) Cold Press paper is non-negotiable here. Cotton retains moisture longer, giving you the precious extra minutes needed to blend soft, seamless cloud edges.
2. Understanding Form & Choosing Your Colors
Understand the Form
Clouds are not flat cutouts; they are massive, three-dimensional structures made of soft, rounded forms. When planning your painting, think big shapes first, then build the details. Imagine them as a collection of shifting spheres stacked together.
The Palette
Clouds reflect the light from the sun and the color of the surrounding sky. A standard daytime cloud requires four core tones:
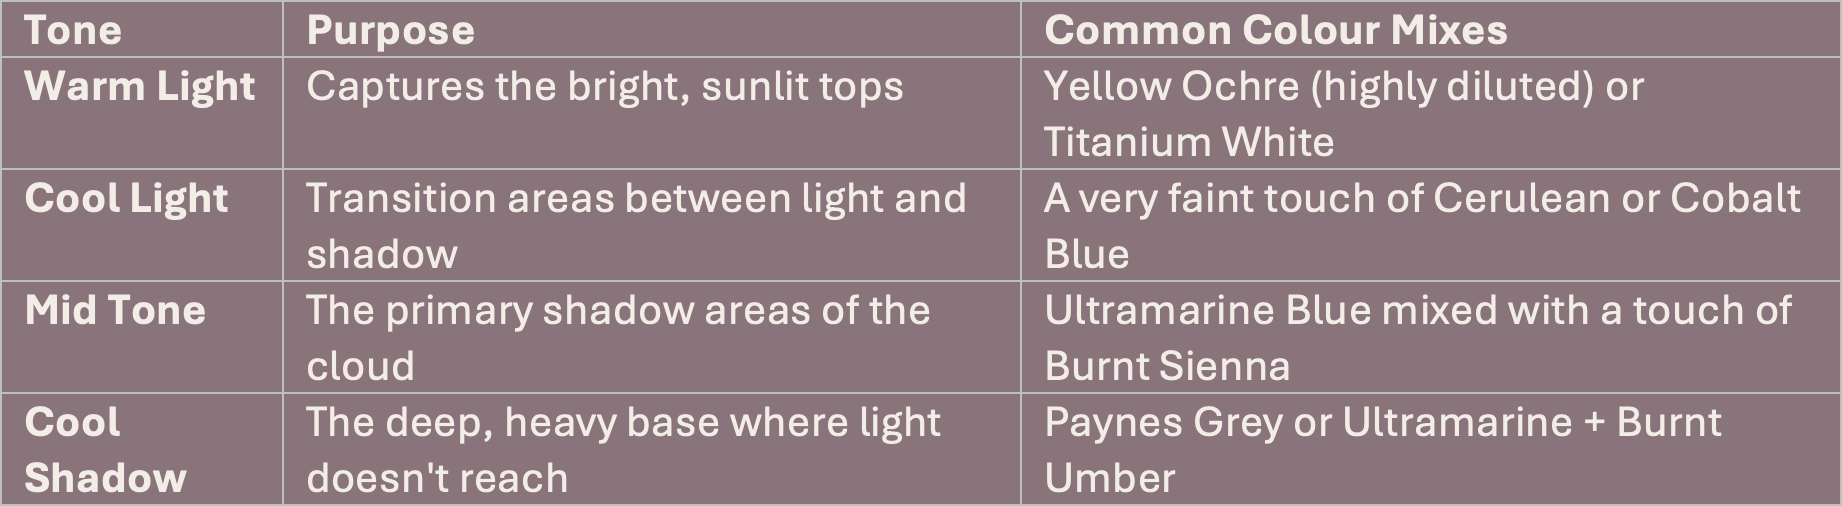
3. The 6-Step Cloud Painting Process
Now, let's look at the step-by-step process to bring a classic, high-contrast daytime cloud to life.
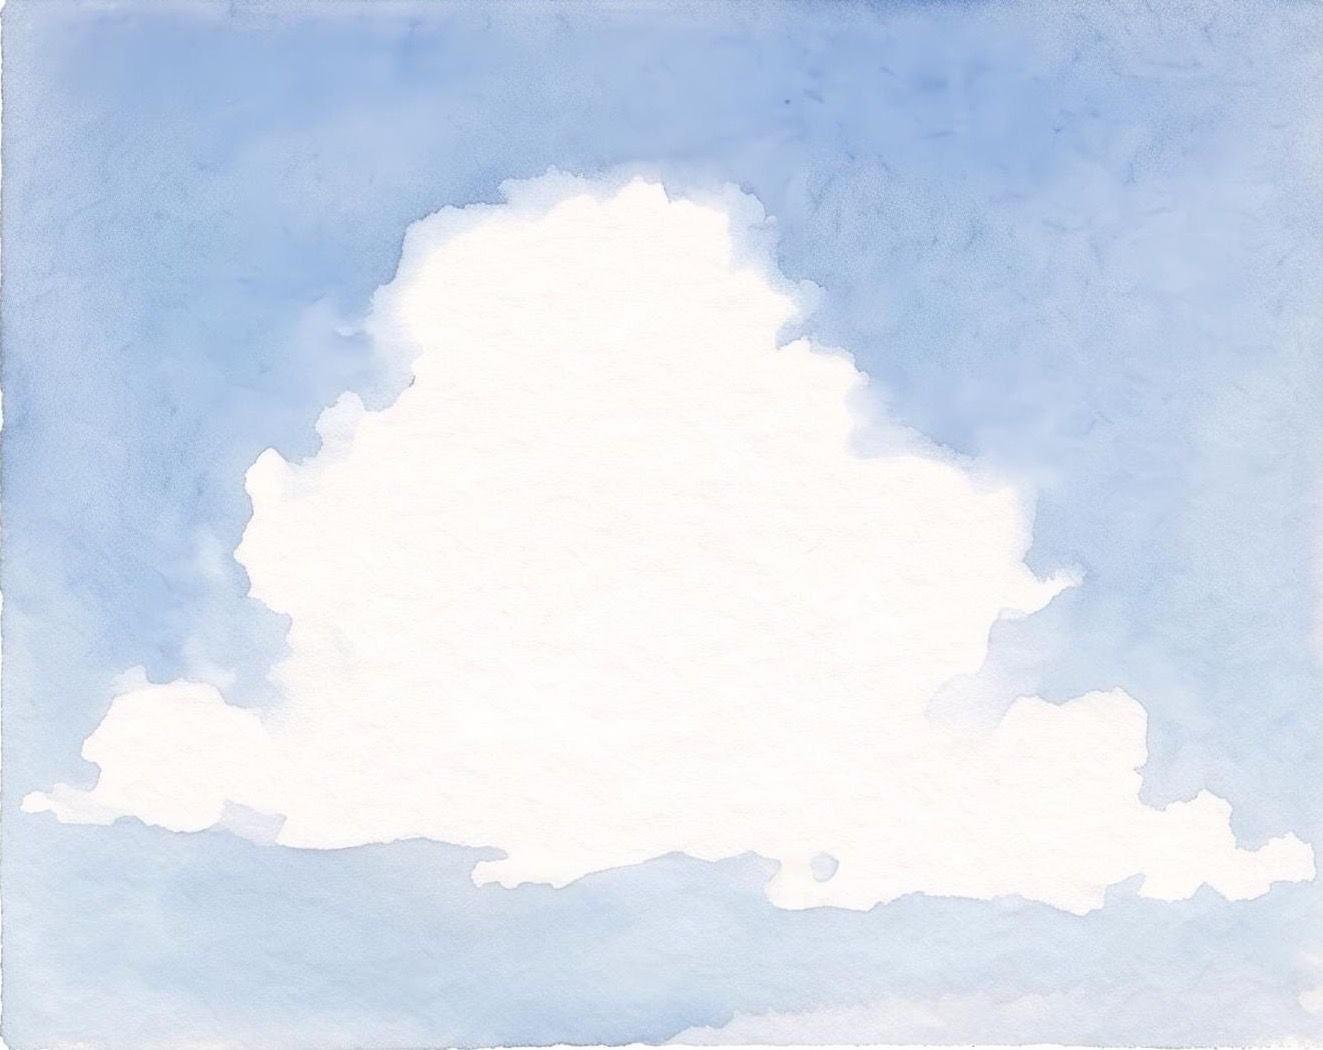
Step 1: Block In
Visual:A clean, wet sky-blue wash on paper, leaving a soft, white, organic cloud silhouette in the center.
First, use your flat or mop brush to pre-wet the entire sky area with clean water. While the paper is still damp, load your medium round brush with a light blue sky wash (like Cobalt or Cerulean) and drop it around your intended cloud shape. Let the wet paper soften the outer boundary of the cloud automatically.
Step 2: Establish Light & Shadow
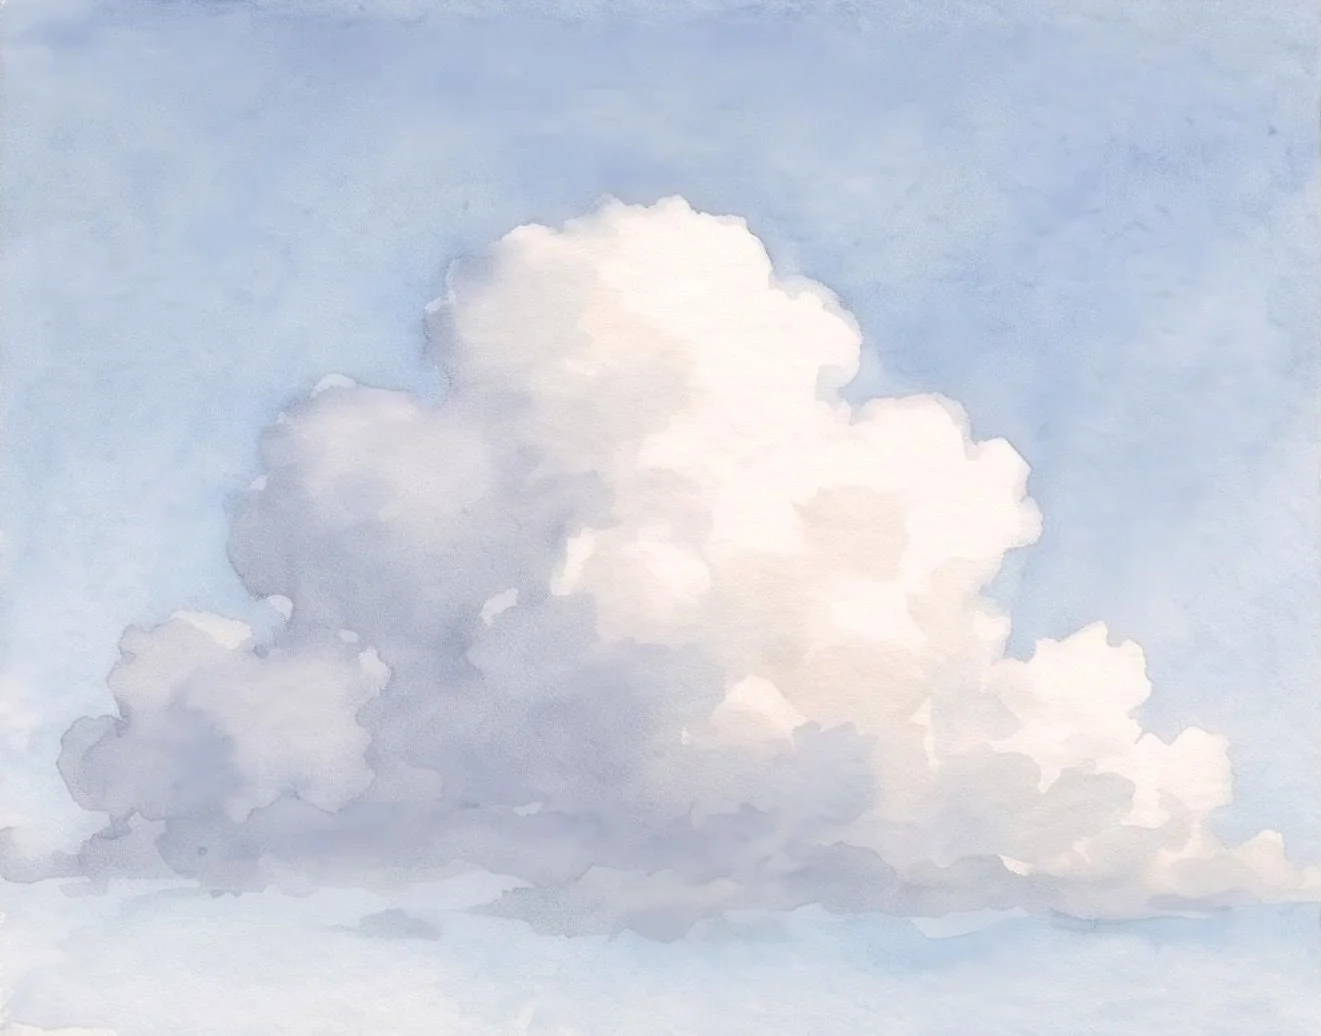
Visual:The same cloud shape, but now featuring a soft, muted grey-blue tone painted along its lower half and midsection, leaving the top bright white.
Mix a soft mid-tone shadow (Ultramarine Blue + a tiny drop of Burnt Sienna). While the sky background is still slightly damp but not pooling, gently drop this mid-tone into the lower sections and under-curves of your cloud. Keep the very top of the cloud crisp white and the edges incredibly soft.
Step 3: Build Volume
Visual:The cloud begins to pop off the page as deeper, richer blue-grey shadows are layered underneath the initial mid-tones, creating three-dimensional depth.
Now, deepen your shadows to define the internal structure of the cloud. Mix a slightly thicker, cooler shadow tone with less water. Carefully paint this into the deepest crevices of the cloud's underside to refine the shape and give it a weighty, three-dimensional volume.
Step 4: Add Details
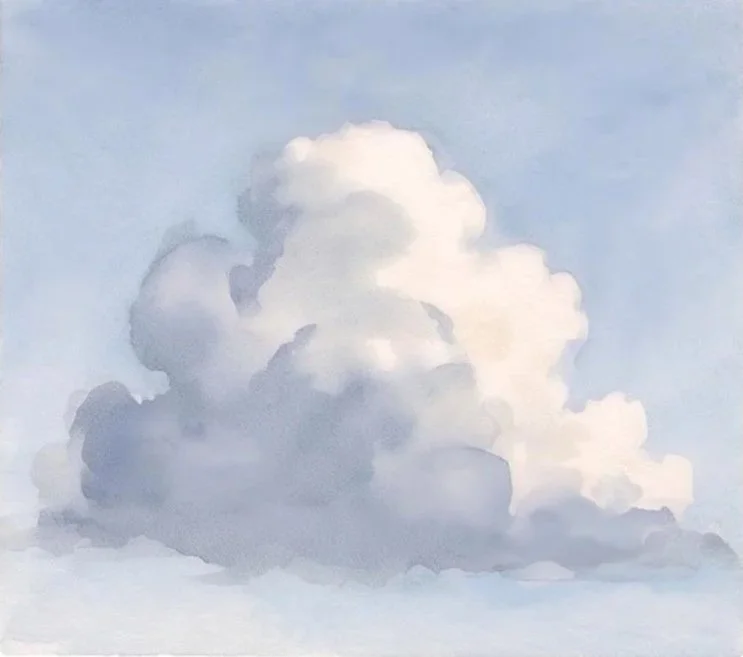
Visual:A close-up view showing a smaller brush adding subtle, irregular textures and wispy mini-clouds around the main formation.
Switch to a smaller round brush. Use a lighter touch to suggest texture, mini overlapping tufts, and interesting, wispy edges around the perimeter. Be careful not to overwork this step, leaving some areas simple and untouched creates a more natural look.
Step 5: Reflect the Sky
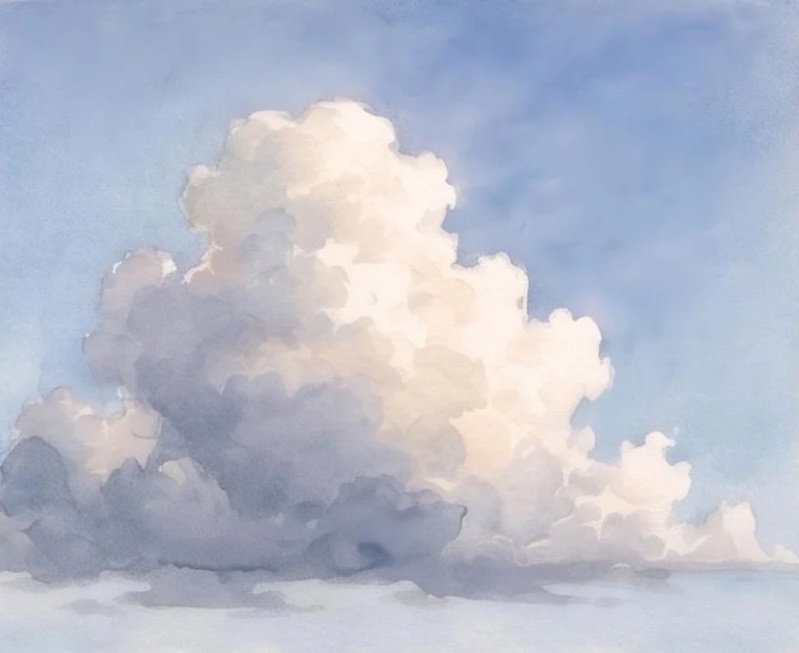
Visual:The lower base of the cloud subtly reflecting the pale blue of the horizon, blending smoothly into the deeper gray shadows.
Clouds are massive mirrors for atmospheric light. Add a very subtle hint of your background sky color directly into the shadow areas, particularly near the base of the cloud where it meets the horizon. This instantly unifies the painting and makes the cloud feel like it belongs in the environment.
Step 6: Final Touches
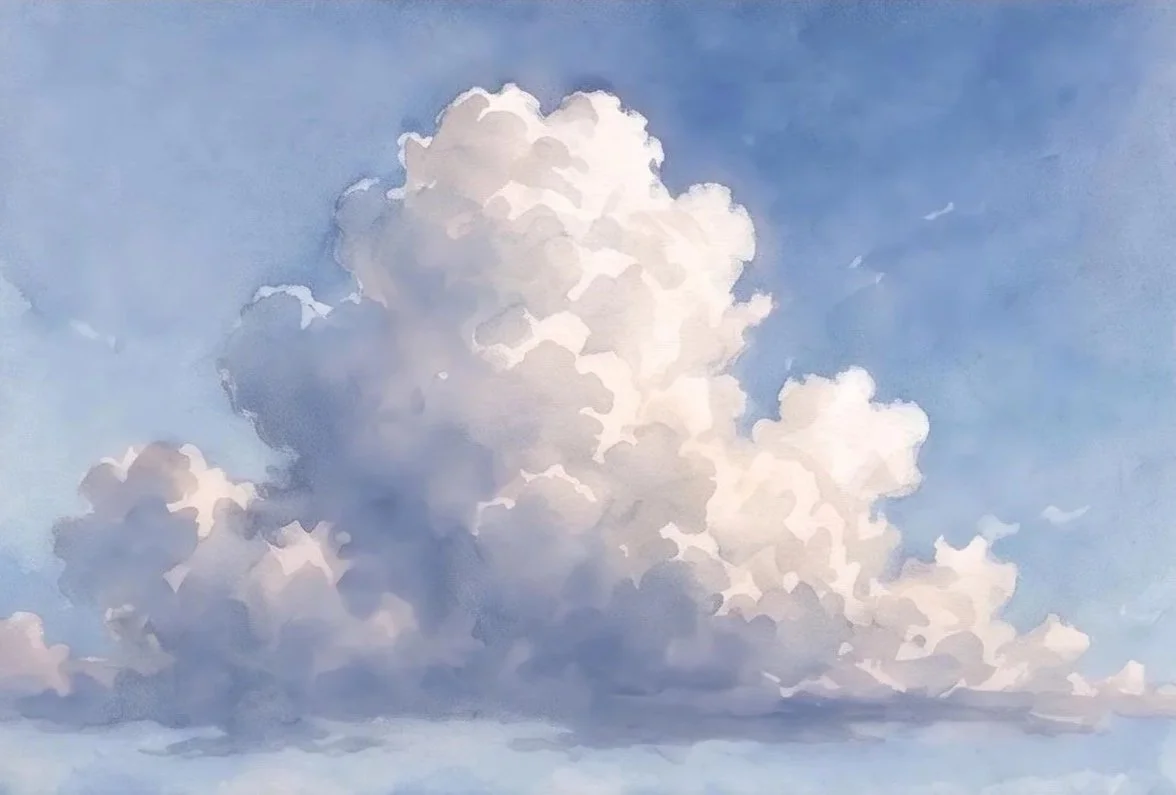
Visual:The finished, breathtaking watercolor painting of a cumulus cloud under a brilliant blue sky, with a perfect balance of soft and crisp edges.
Take a step back and look at your piece. Enhance the contrast gently by deepening any lost shadows. If any edges look too harsh or accidental, take a clean, slightly damp brush and softly blur them out. Ensure a beautiful balance of soft edges (far away) and hard edges (closer to the viewer).
4. Pro-Tips to Keep in Mind
Think Big to Small: Always map out your largest shapes and major shadow zones before you worry about a single texture or edge detail.
Vary Your Edges: Real clouds are a mix. Use Soft Edges (blended out on wet paper) for areas that are farther away or dissolving, and Hard Edges (painted on dry paper) for closer, crisp shapes directly catching intense sunlight.
The Golden Rule of Light: In standard daytime settings, light always hits from the top and toward the sun. Keep your highest points clean, unpainted paper white for maximum brilliance.
With watercolor, practice is all about learning how the water behaves on the page. Grab your favorite cotton paper, mix up some soft blues and grays, and let your creativity drift into the sky!
